A Summer Sun Motif/Appliqué
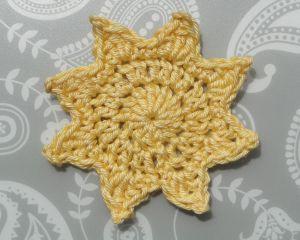
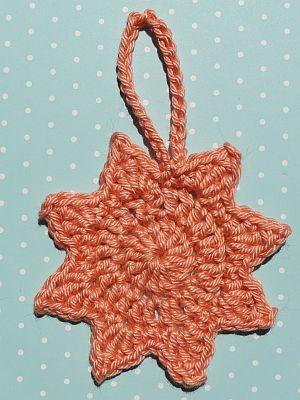
Summer's coming - hooray! Well... even if it isn't, if you fancy a little more sun in your life, here are two patterns: a cute 3-rounder and a larger 5-rounder:
|
|
Both patterns feature rounds of double crochet (UK trebles) - followed by some terrific triangles to make the sun's rays.
The smaller sun is worked in fingering weight 100% cotton yarn (YarnArt Begonia) and the larger one was made in sports weight cotton; I used a 3 mm hook for both.
Tip: You can press your sun with an iron to really get it into shape! Dampen the sun and press it on the wrong side, pulling the tips of the sun's rays out to make them even "sunnier" :)
On this page you'll find:
~~~~~
Sun Crochet Pattern in 3 Rounds
We start with a magic ring - and my page all about that wonderful invention is here!
US crocheters:
Make a magic ring.
Round 1: Chain 2, 12 dc into ring. Sl st into top of first dc to join. (Yes, you miss those first two chain.) (12 stitches.)
Round 2: Chain 3 (counts as 1 dc,) dc into same stitch. 2 dc into each stitch around to end. (24 stitches.)
Join with a sc into top of 3 ch. (You will work your very last stitch into this sc at the end of the next round.)
Round 3: Each sun ray is made thus :-
* Into next stitch, work 1 dc, 1 trc, [2 ch, sc into top of trc = picot] 1 dc, 1 hdc.
1 sc into each of next two stitches.*
Repeat from * to * until you have worked 7 sun rays.
Now work your 8th and final triangle in the same way, but finishing with just 1 sc into the last stitch, and 1 sl st into the first joining sc you made.
~~~~~~~~~~~~
Crocheters using UK terminology:
Make a magic ring.
Round 1: Chain 2, 12 tr into ring. Sl st into top of first tr to join. (Yes, you miss those first two chain). (12 stitches).
Round 2: Chain 3 (counts as 1 tr), 1 tr into same stitch. 2 tr into each stitch around to end. (24 stitches).
Join with a dc into top of 3 ch. (You will work your very last stitch into this dc at the end of the next round.)
Round 3: Each sun ray is made thus:
* Into next stitch, work 1 tr, 1dtr, [2 ch, dc into top of dtr = picot] 1 tr, 1 htr.
1 dc into each of next two stitches.*
Repeat from * to * until you have worked 7 sun rays.
Now work your 8th and final triangle in the same way, but finishing with just 1 dc into the last stitch, and 1 sl st into the first joining dc you made.
Photo Tutorial for 3 Round Sun
Factor 50. Long sleeved, billowing t-shirt. Huge umbrella. Hat. That's me on the beach - and I'll burn to a crisp despite the whole kaboodle... what's a girl to do?
Oh, I know! I'll just crochet a sun and have done with it! Here we go.............
1. Make a magic ring.
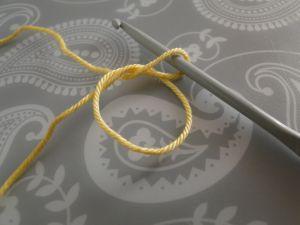
2. Chain 2.
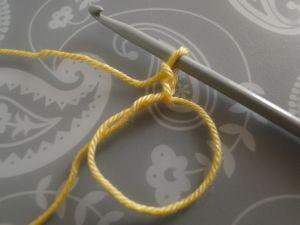
3. Work 12 dc (UK tr) into ring.
I've put a stitch marker into the top of the first dc (UK tr), as that's where I'm going to make the join at the end of this round.
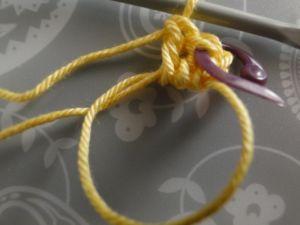
4. Once you've made your 12 stitches, join with a slip stitch into the top of the first treble.
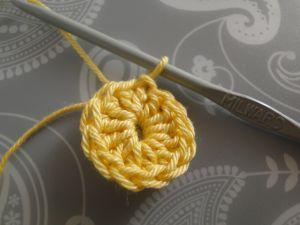
5. Chain 3, 1 dc (UK tr) into same stitch.
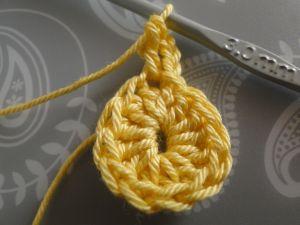
6. Work 2 dc (UK tr) into each stitch until end.
(24 stitches.)
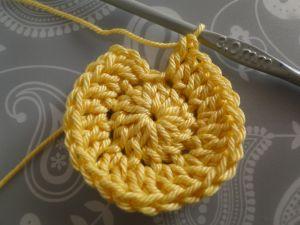
Now we're going to join the round by stitching into the top chain of the three chain we worked at the start.
The stitch marker shows us where to go, so....
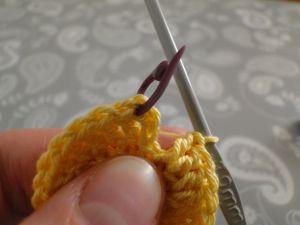
7. Join into top of 3 ch with a sc (UK dc.)
I've put my marker into this stitch, because at the end of this round, we'll be finishing off here!
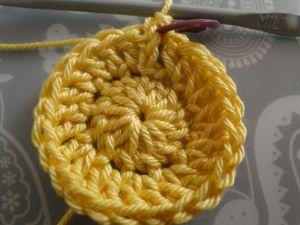
Make sure you can see the next stitch to work into - this one likes to hide a bit!
In steps 8 - 11 we'll work two stitches, then a picot, and then another two stitches into this next stitch:
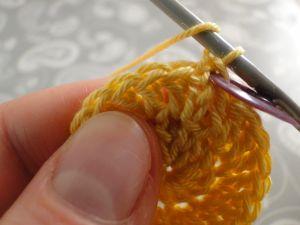
8.
US: 1 dc, 1trc into next stitch.
UK: 1 tr 1 dtr into next stitch.
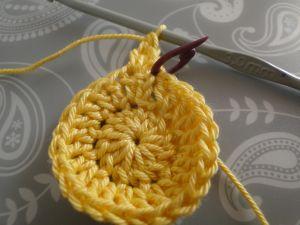
9. Now for the picot.
Chain 2.
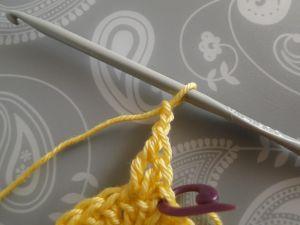
Just so you can see where to put your hook next, I've put some blue yarn through the top two loops of the trc (UK dtr) you just made:
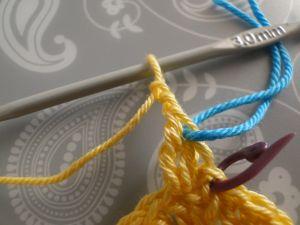
10. Work 1 sc (UK dc) into top two loops of the triple crochet (UK double treble) you made.
Try and keep your yarn under control ;)
I try and keep it on the left of my hook as much as I can.
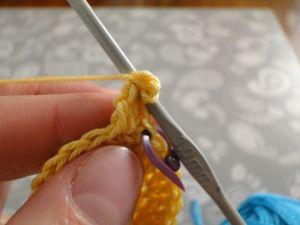
Ok - so now we have two stitches with a picot sitting on top.
That's the first "half-and-a-bit" of the triangle.
Now we need two more stitches to finish that group.
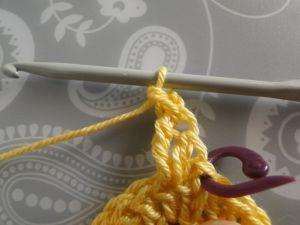
11. Work 1 dc (UK treble) and 1 hdc (UK htr) to complete your triangle.
So, you have made
- 2 stitches
- a picot
- and 2 more stitches
all into this one stitch.
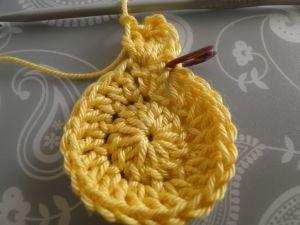
12. Now we create a little space between the triangles.
Work 1 sc (UK dc) into each of next two stitches.
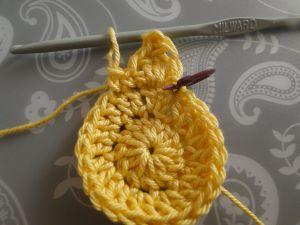
13. Repeat steps 8 - 12, making your triangles followed by two sc (UK dc), until....
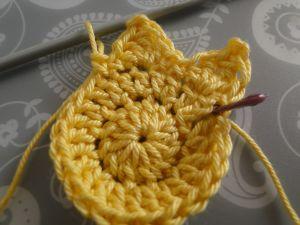
14. ...you come to the end of the last triangle, where you must work only one sc (UK dc) into the last stitch of this round.
But worry not!
One more tiny stitch awaits to finish things off neatly!
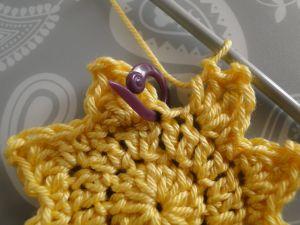
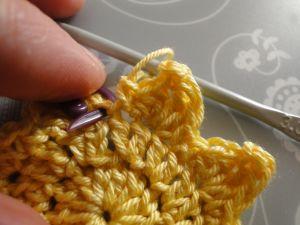
15. 1 sl st into the first stitch of the round - which was the sc (UK dc) you worked to join the row at the beginning in step 7.
If you used a stitch marker, you can easily see where to work it.
Finishing off:
Weave in your ends.
Now, if you'd like to make this into a hanging decoration, make a chain to your desired length, then slip stitch into the bottom of the chain. (I think I managed to slip stitch into the last sl st - quite a tight stitch, but I did it!)
Crochet a Bigger Summer Sun in 5 Rounds!
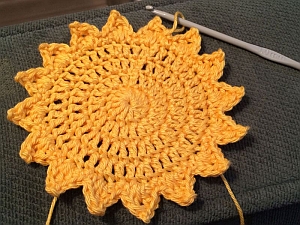
Hot off the hook, heh heh! Here are the instructions in US terms - UK equivalents are:
sc = UK dc
dc = UK tr
hdc = UK htr
trc = UK dtr
Start: Make a magic ring.
Round 1: Chain 2, 12 dc into ring. Ss into top of first dc to join. (Yes, you miss those first two chain.) (12 stitches.)
Round 2: Chain 3 (counts as 1 dc,) dc into same stitch. 2 dc into each stitch around to end, join with a ss. (24 stitches.)
Round 3: Chain 3, (counts as 1 dc,) dc into same stitch, 1 dc into next
st; *2 dc into next st, 1 dc into next st* Repeat from * to * around,
join with a ss. (36 sts)
Round 4: Chain 3, (counts as 1 dc), dc into same stitch. 1 dc into each
of next 2 sts; *2 dc into next st, 1 dc into each of next 2 sts*; work
from * to * around. (48 sts.)
Join with a sc into top of 3 ch. (You will
work your very last stitch into this sc at the end of the next round.)
Round 5: Each sun ray is made thus :-
* Into next stitch, work 1 dc, 1 trc, [2 ch, sc into top of trc = picot] 1 dc, 1 hdc.
1 sc into each of next two stitches.*
Repeat from * to * until you have worked 15 sun rays.
Now work your 16th and final sun ray in the same way, but finishing
with just 1 sc into the last stitch, and 1 ss into the first joining
sc you made.
And here's some sun through maple leaves... wonderful!

~~~~~
