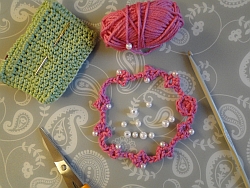
Empress Matilda Bracelet
A rather grand name for a very simple bracelet, but I just couldn't resist!
|
|
You'll need: Your chosen yarn and hook. A needle to suit your yarn and beads. Between 10 - 15 round pearly beads depending on how long/loose you want your bracelet to be.
I used: Lion Brand Bonbons yarn - this is sport weight - and a 3mm hook. I needed 8 beads for my bracelet.
Quick written instructions for you all below - as well as a full photo tutorial.
Empress Matilda Bracelet Pattern
We start with a magic ring - and my info on that is on this page :)
US Terms:
1. Thread beads onto your yarn - around 10 or so, depending on yarn and wrist size - if in doubt, thread 15 and that should do it.
2. Make a magic ring. Ch1, 8 sc into ring, join with ss into first sc made. Pull ring tight.
3. Chain 6, 1 sc into 4th chain from hook, working into two loops of the chain.
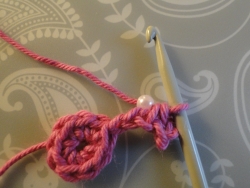
4. Move one bead right up next to hook.
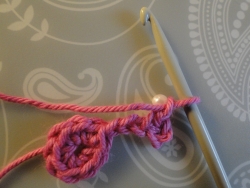
5. Chain 1 to secure bead.
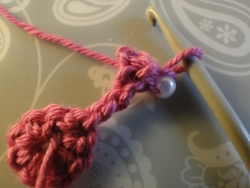
6. Turn. Make no chain.
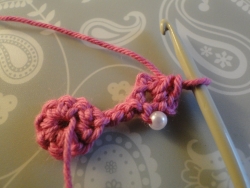
7. 2 sc into first stitch.
Repeat steps 3 - 7, then test the fit!
8. Ch 2.
Lay your bracelet out flat.
Now
join with a ss into the opposite side of your magic circle ring from
where you began, working front to back, ie from the side facing you to
the back of the circle.
Then slip stitch around a few stitches to join at the beginning of the 6 chain you made in Step 3.
Scroll down to see pix of how to join.
Fasten off. Weave ends into the sc stitches of the magic ring.
Want to make a larger version with dc? - see below!
UK terms:
1. Thread beads onto your yarn - around 10 or so, depending on yarn and wrist size - if in doubt, thread 15 and that should do it.
2. Make a magic ring. Ch1. 8 dc into ring, join with ss into first dc made. Pull ring tight.
3. Chain 6, 1 dc into 4th chain from hook, working into two loops of the chain.
4. Move one bead right up next to hook.
5. Chain 1 to secure bead.
6. Turn. Make no chain.
7. 2 dc into first stitch.
Repeat steps 3 - 7, then test the fit!
8. Ch 2.
Now join with a ss into the opposite side of your magic circle ring
from where you began, working front to back, ie from the side facing you
to the back of the circle.
Then slip stitch around a few stitches to join at the beginning of the 6 chain you made in Step 3.
Scroll down to see pix of how to join.
Want to make a larger version with trebles? - see below!
Step by step photo tutorial
Step 1: Thread your beads onto your yarn.
My bracelet only needs 10 beads, if that.
But depending on your yarn and the size of your bracelet, you could thread around 12 - 15 beads I would think:
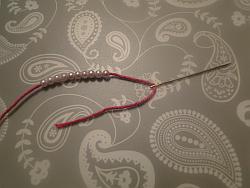
If you don't use some of the beads, you just take the extra ones off your yarn at the end.
Push the beads down the yarn a little to give you room to work.
~~~~~
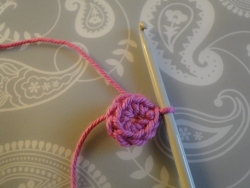
Step 2: Make a magic ring. Ch1, 8 sc (UK dc) into ring. Join with a ss into first sc (UK dc)
Pull ring tight:
~~~~~
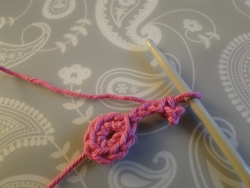
Step 3: Ch 6. 1 sc (UK dc) into 4th chain from hook, working into the top two loops of the chain:
~~~~~
Step 4: Move a bead up next to your hook:
~~~~~
Step 5: Ch 1. This chain works itself around the bead and secures it nicely.
~~~~~
Step 6: Turn. Do not make any chain.
~~~~~
Step 7: Work 2 sc (UK dc) into the very first stitch.
There is only one stitch there, in fact - it's the sc (UK dc) you made in Step 3, and it's sitting snugly right next to the chain you made around the bead, so it's sitting a little lower than usual:
~~~~~
Repeat Steps 3 to 7! Then test the fit. Eight beads/pattern repeats are fine for me.
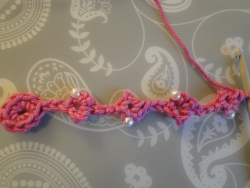
~~~~~
Step 8: Ch 2. Lay your bracelet out flat:
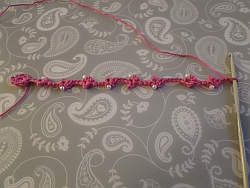
Then work a ss into the opposite side of the magic ring from where you started.
I'm working from the side facing me to the back of that stitch:
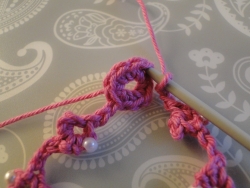
Now ss around to the chains you made for the first bead.
Fasten off. Pull the ring tight again, as it's no doubt trying to get bigger. Then weave your ends into the stitches of the magic ring, hiding them nicely:
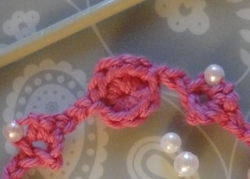
If you have an odd number of beads/pattern repeats, then you will be working into the other, "wrong" side of the magic circle, but don't let that put you off!
Just join with a ss, working from front (the side facing you) to back there, too.
Here I am working around from my join to the opposite side. I'll fasten off here, pull the ring tight, and weave in my ends.
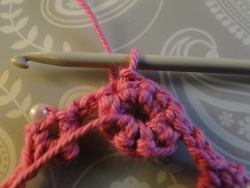
Working around on the "wrong" side to finish off.
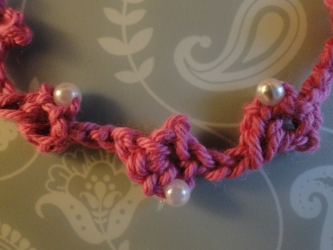
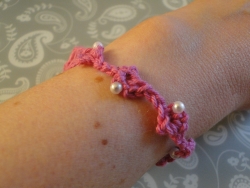
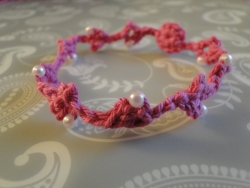
And here is my finished bracelet:
 |
 |
 |
A slightly larger version!
Yep, you can use dc (or trebles for us UK-ers) to make the shapes a little larger.
It's the same beginning, but once you've made the magic circle, this is the pattern to follow:
1. Chain 6, dc (UK tr) into 4th chain from hook.
2. Move one bead up next to hook.
3. Chain 1 to secure bead.
4. Turn. Make no chain.
5. 2 dc (UK tr) into the hole between the chain and your dc (UK tr) from last row:
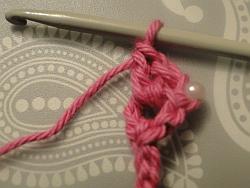
After chaining to secure the bead, turn. Then make your next 2 stitches into the big space below.
Repeat those five steps for this pattern, then ch 2, ss into the opposite side of the magic ring, ss around ring to the first chains you made in Step 1, and fasten off.
- Home
- Crochet Jewelry
- Empress Matilda Bracelet
