Crochet a Lacy Heart Garland
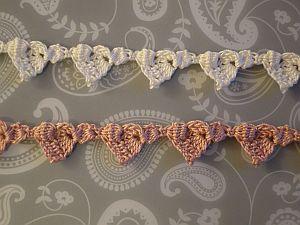
Here is a heart-and-shell garland I'm sure you'll love! It was fantastic working on this pattern. I seemed to get inspired... so... tra la!!! Here it is!

|
|
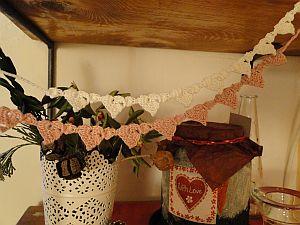
Crochet these heart garlands in several colors, then place them wherever you wish!
Each garland is worked in one piece, just as a braid.
Yarn is Coats Puppets Eldorado 10, which is thread weight. Hook: 1.75mm
Feel free to use any yarn you think will show off the pretty shapes and textures you're going to create!
~~~~~
Let me just explain a few things before we begin, and then you can fly through the pattern without having to wonder what I'm talking about :)
We're going to use the following two bobbles in this pattern:
Five stitch bobble secured with a chain.
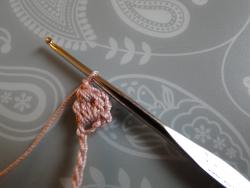
Seven stitch bobble secured with a chain.
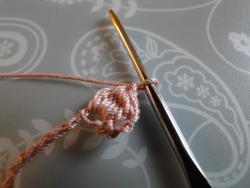
The bobble stitch:
Work from * to * five times for a 5 stitch bobble, and 7 times for a seven stitcher:
*Yarn over, hook into stitch, pull through yarn.
Yarn over, pull yarn through first two loops on hook.*
To finish: yarn round hook, pull through all loops on hook.
If you've never crocheted bobbles before, check out my full bobble tutorial!
In this pattern you will work either two or three chain once you have made your bobble.
You will also work into the back loop of the first chain stitch you made after crocheting your bobble.
This back loop is quite easy to see, as it's the stitch that runs across the top of the bobble loops.
For example:
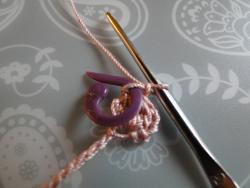
I've made a bobble and chained 1.
My stitch marker shows you the back loop of that chain.
Make this chain fairly tight! It will soon grow enough once you start stitching into it.
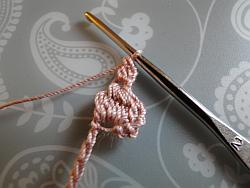
Here's an example of stitching into the back loop of the first chain worked.
I made a bobble and chained 3.
Then, without turning, I worked a dc (UK tr) into the back loop of the first chain I made.
OK, let's start! We begin with the written pattern in both US and UK terms.
And below there is a full step by step photo tutorial to walk you through if necessary.
Heart Garland Pattern
US Terms:
Step 1: Make a chain 6 inches/15 cm long, or long enough for you to tie your garland where you wish.
Work a 5 stitch bobble in the 4th chain from hook.
When working into a chain stitch, I insert my hook under the top two loops of the chain stitch in this pattern.
Step 2: Chain 3. Do not turn.
Step 3: Work 7 dc into back loop of 1st chain worked.
Step 4: Chain 2. Do not turn. 2 sc into first chain worked, chain 1. Picot made.
Turn work around from right to left. (I'm right handed...)
Step 5: Working into the dc in the row below, miss 1st dc, 1dc into each of next 2 stitches.
Step 6: Miss next stitch. Work a 7 stitch bobble into the next stitch.
Chain 2. Do not turn.
Work a hdc into back loop of first chain worked.
Chain 3. Now turn your work from right to left again.
Step 7. Make a 5 stitch bobble into the hdc just worked.
Step 8. Chain 3. Do not turn.
Repeat from Step 3 to Step 8 for pattern.
To finish: end at Step 8. Instead of crocheting 3 chain, make your chain 6 inches/15 cm long, to match the chain you made at the beginning. Block if you like - I dampened and carefully ironed my garland.
UK Pattern:
Step 1: Make a chain 6 inches/15 cm long, or long enough for you to tie your garland where you wish.
Work a 5 stitch bobble in the 4th chain from hook.
When working into a chain stitch, I insert my hook under the top two loops of the chain stitch in this pattern.
Step 2: Chain 3. Do not turn.
Step 3: Work 7 tr into back loop of 1st chain worked.
Step 4: Chain 2. Do not turn. 2 dc into first chain worked, chain 1. Picot made.
Turn work around from right to left. (I'm right handed...)
Step 5: Working into the trebles in the row below, miss 1st tr, 1tr into each of next 2 stitches.
Step 6: Miss next stitch. Work a 7 stitch bobble into the next stitch.
Chain 2. Do not turn.
Work a htr into back loop of first chain worked.
Chain 3. Now turn your work from right to left again.
Step 7: Make a 5 stitch bobble into the htr just worked.
Step 8: Chain 3. Do not turn.
Repeat from Step 3 to Step 8 for pattern.
To finish: end at Step 8. Instead of crocheting 3 chain, make your chain 6 inches/15 cm long, to match the chain you made at the beginning. Block if you like - I dampened and carefully ironed my garland.
Photo Tutorial
Step 1: Make a 6 inch/15 cm chain (or more, if you need a longer length to tie your garland.)
In the fourth chain from your hook, work a 5 chain bobble.
When working into a chain stitch, I insert my hook under the top two loops of the chain stitch in this pattern:
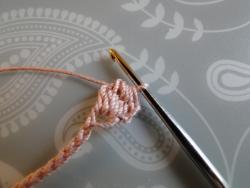
Step 2: Chain 3. Do not turn.
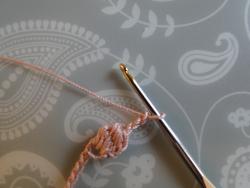
Step 3: Work 7 dc (UK tr) into the back loop of the first chain you made:
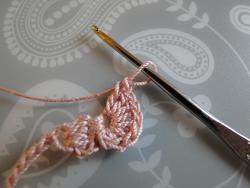
Step 4: Chain 2. Do not turn.
Then work 2 sc (UK dc) into the first chain worked.
(The pic below shows how I put my hook through right to left in that first chain to make these two stitches.)
Now chain 1.
You have now made a little picot which will end up at the bottom of your heart!
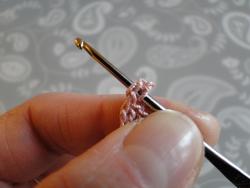
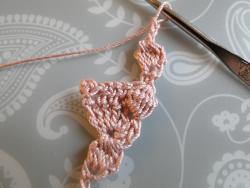
This is how things should look so far:
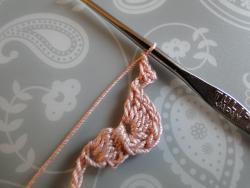
Step 5: Turn your work.
I turn my work here from right... to left, just like turning a page in a book. (I'm right handed by the way.)
Now we work into the double crochets (UK trebles) in the previous row:
Miss first stitch.This first stitch is trying to hide underneath the picot by the way!
One dc (UK tr) into next two stitches.
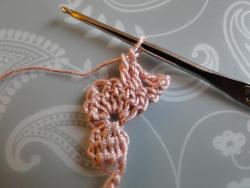
Step 6: Miss the next stitch.
Work one seven stitch bobble into the next stitch.
Chain 2. Do not turn.
Work 1 hdc (UK htr) into the back of the first chain worked.
Chain 3.
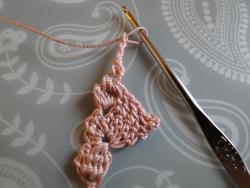
Turn your work from right to left again:
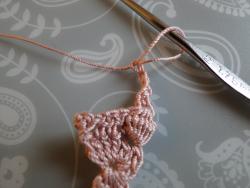
Step 7: Work a 5 stitch bobble into the hdc (UK htr) just worked:
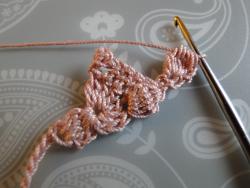
Step 8: Chain 3. Do not turn.
And now....
Repeat from step 3 to step 8 to continue your garland!
When you've finished, just keep chaining here at the end of Step 8 for six inches or 15 cm or however long your beginning chain is from Step 1.
~~~~~
- Home
- Crochet Hearts
- Heart Garland
