Crochet Bobble Braids
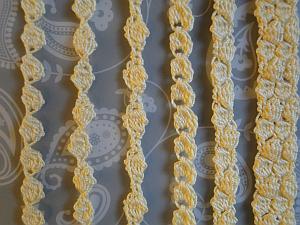
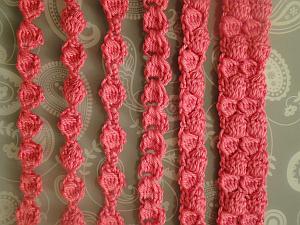
I've crocheted these braids in two different weights of cotton:
|
|
In each pic above from left to right:
~~~~~
The Bobble Stitch
All the patterns below make use of the five stitch bobble.
This means you work five times into the same chain or stitch :)
Here's how to do it:
*Yarn over, hook into stitch, pull through yarn.
Yarn over, pull yarn through first two loops on hook.*
Working into the same stitch, repeat from * to * 4 times.
To finish: yarn round hook, pull through all six loops on hook (your five bobble stitches plus your original loop on the hook.)
Check out my bobble photo tutorial for more info about bobbles!
Tips:
The patterns here start with just a few chain which you work into so that the braid begins immediately.
When working a stitch into a chain stitch, I work under two loops of the chain.
If you would like a length of chain at the beginning and end of your work (to hang your braids or to use them as ties for a bracelet, for example) then feel free to work your chosen number of chain at the beginning. Decide where to finish your braid, work another length of chain and tie off.
Super Simple Bobble Braid
Chain, make a bobble, chain, make a bobble! No turning your work here, very quick, very effective.
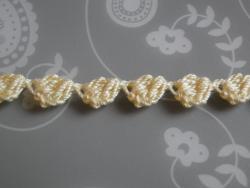
Step 1: chain 4, bobble into 4th chain from hook.
Step 2: chain 5, miss three chain, bobble into next chain.
Repeat Step 2 for pattern.
Finishing: chain 1, turn, 1 sc (UK dc), 1 ss into the top stitch.
Back and Front Braid
With this braid, you turn your work once between each bobble, so that you get
alternate backs and fronts of the bobble showing, resulting in a very
pretty effect. The braid is also slightly wavy.
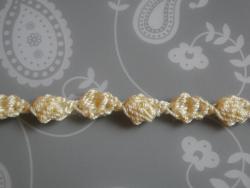
Step 1: chain 4, bobble into 4th chain from hook.
Step 2: chain 1, turn. sc (UK dc) into 1st stitch.
Step 3: chain 4, bobble into 4th chain from hook.
Repeat Steps 2 and 3 for pattern.
To finish: chain 1, turn. ss into 1st stitch.
Long John
This braid is worked in a similar way to the Back and Front braid above - it is, however, straighter, has a longer join between the bobbles, and the finished piece has no alternating back-front look to it.
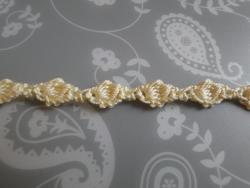
Step 1: chain 4, bobble into 4th chain from hook.
Step 2: (chain 1, turn. sc (UK dc) into 1st stitch) three times.
Step 3: chain 4, turn. bobble into 1st stitch.
Repeat Steps 2 and 3 for pattern.
To finish: Chain 1, turn. ss into first stitch.
Bobble and DOT!
This one grows fast, and I love that little space in between the bobbles, so I named it "Dot!" It's really fun to do :)
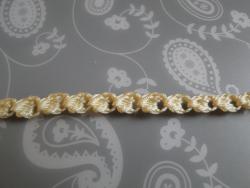 Front of the Bobble Dot braid...
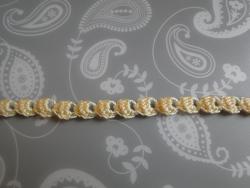 ... and the back!
Step 1: Chain 4, bobble into 4th chain from hook.
Step 2: Chain 4. Do not turn. Bobble into back loop of 1st chain worked - see pix just below!
Repeat Step 2 for pattern
To finish: Chain 1, turn, ss into first stitch.
Here's where to work that bobble in Step 2:
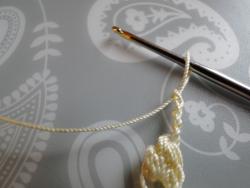 Chain 4.
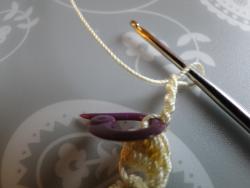 Stitch marker showing back loop
of 1st chain worked.
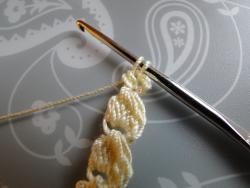 Start working your bobble
into that back loop.
Single Bobble Braid
This is the single... the double is below!
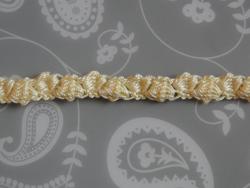
Step 1: Chain 4, bobble into 4th chain from hook.
Step 2: Chain 4, turn. Bobble into the top two loops lying next to the first chain you worked. I call this the "top stitch" of the bobble, although it's almost on the side!
Pix just below for you to see Step 2.
Repeat Step 2 for pattern.
To finish: Chain 1, turn. sc (UK dc) and ss into first stitch.
Step 2 in action:
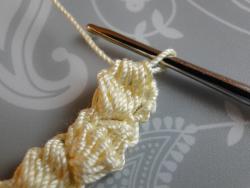 The completed bobble.
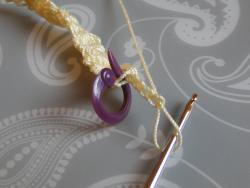 Ch 4 and TURN.
The stitch marker shows you the position of the "top stitch" of the bobble - it's just next to the beginning
of your chain.
Work your bobble into that "top stitch."
Double Bobble Braid
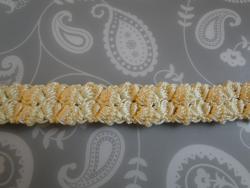
Two bobbles worked on top of two bobbles
with a chain stitch in between each pair.
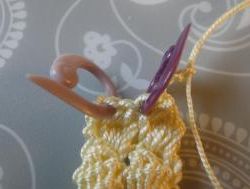
Stitch markers show where your two bobbles
will be worked after you chain 4 and turn.
Step 1: Chain 8, bobble in 4th chain from hook, chain 1, miss 3 chain, bobble into next chain.
Chain 4, turn.
Step 2: Bobble into first stitch (top of last bobble.)
Chain 1.
Miss chain stitch in between bobbles on last row. Bobble in next stitch (top of other bobble.) Chain 4, turn.
Repeat Step 2 for pattern.
To finish: Chain 1, do not turn. ss into the side of the bobble next to the chain you just made.
You can probably imagine the triple bobble version - I'm just finishing my project off with it, and once it's done I'll write it up and put it on here, it's looking really pretty :)
~~~~~
- Home
- Braids & Garlands
- Bobble Braids
